
The printer must first lay out the fish on the cardboard, using pinks to hold its fins in place. (requiring the artist to pin the fish to the cardboard.) Next a color scheme must be established for the fish. This requires mixing inks to find the best color and consistency. Once the artist is ready to ink the fish, they must pat it dry with paper towers to get rid of the fish's mucus membrane. Sometimes rubbing salt helps create a dry surface to work with.
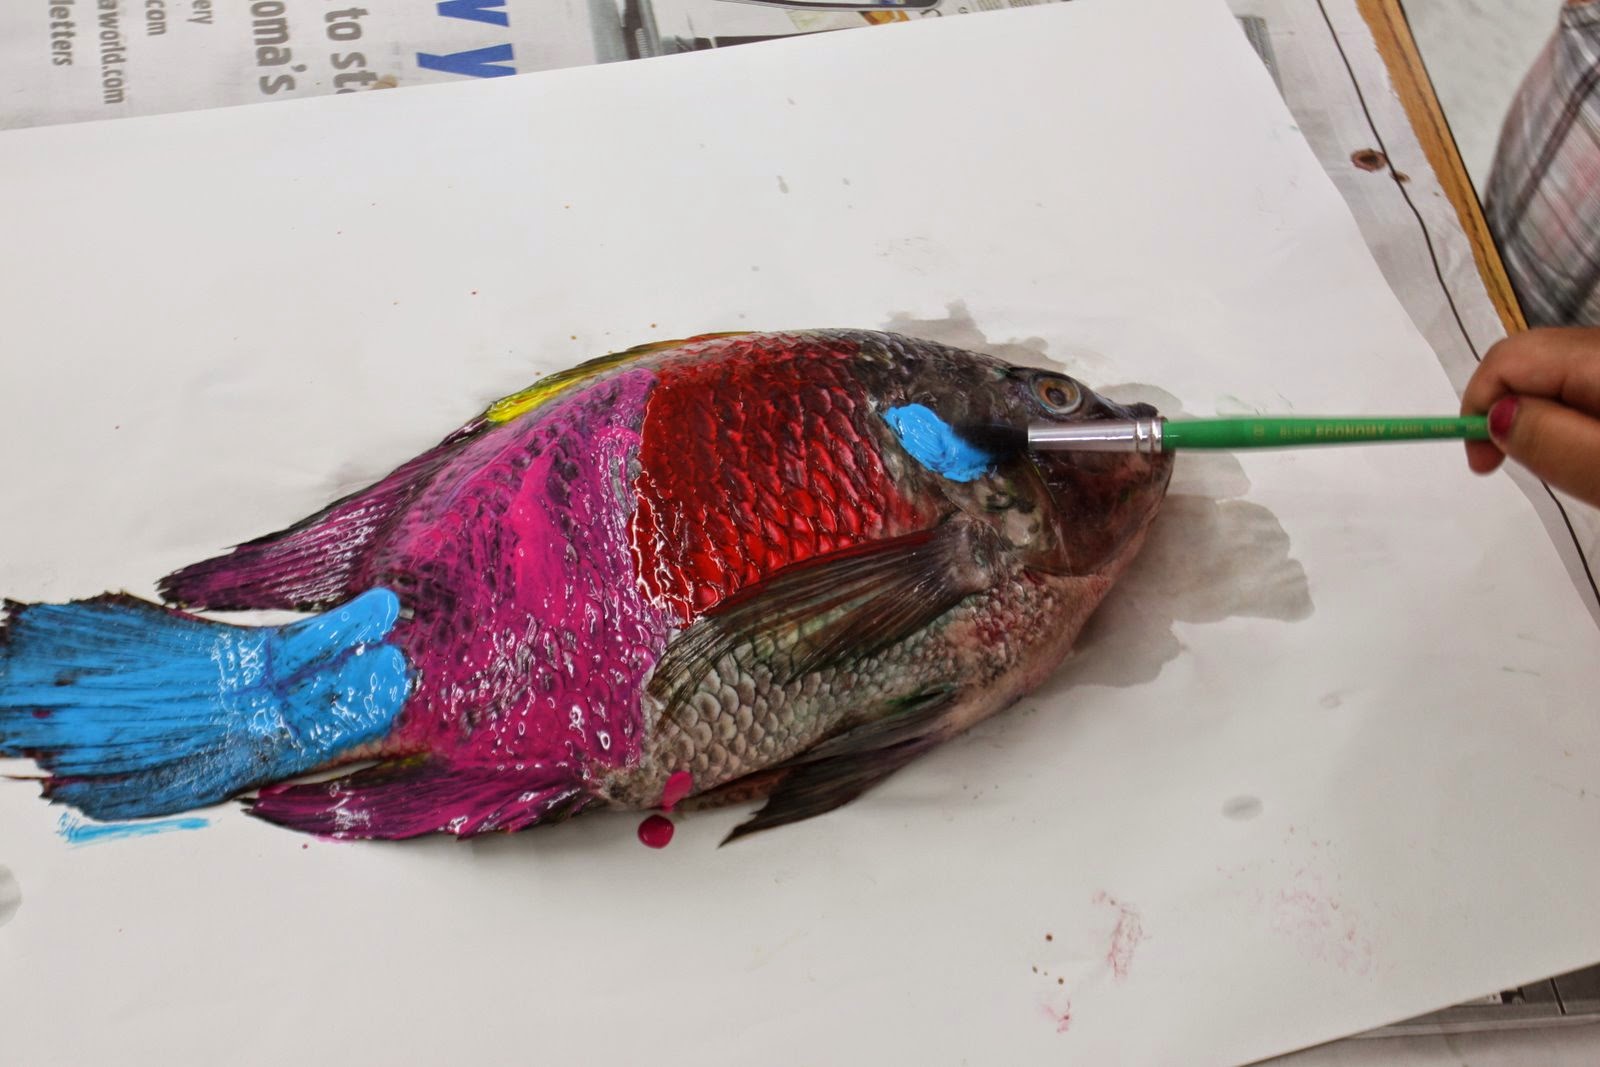
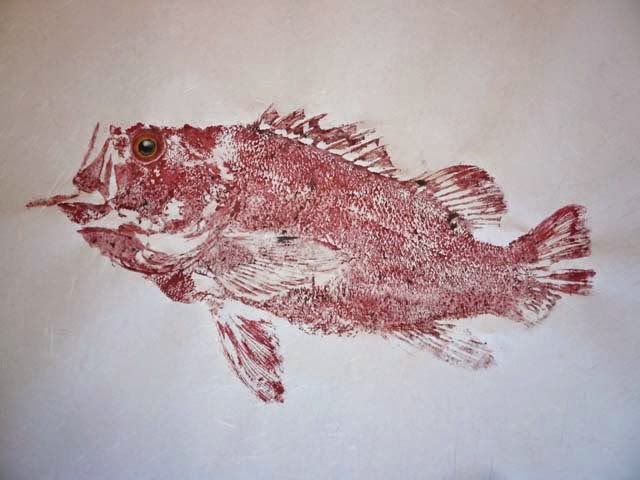
The Fish is now inked, with what ever color the artist chooses. Excess ink is patted off, to deter blotting. Rice paper is than laid over the fish and pressed firmly to the flesh. The artist then rubs the paper with his hand to create the rubbing affect fish printing achieves. When the artist has thoroughly applied pressure to capture detail, they must slowly lif the paper off the fish in order to reveal the image. Be careful to avoid pooling liquid ink, or fragile areas where the paper may tear apart.
Once the paper has been removed from the fish it should be placed on the ground, anchored by weight, to dry off. Allow 20-30 minutes for the drying period as tacky ink will smudge and run.
Stop by the Seafood Festival this Sunday if you have any interest in viewing the process and personally trying it!
Sam
No comments:
Post a Comment